How To Remove Noindex Tag and Unblock Robots.txt

Understanding Meta Robots No Index Tag
The meta robots no index tag is a directive to search engines like Google, essentially saying, “Please don’t display this page in the organic search results.”.
When a page is marked with a no-index tag, it will not appear in Google’s organic search results.
This can be particularly useful for pages that you do not wish to be publicly accessible through search engines, such as internal pages or pages with duplicate content.
Removing Noindex Tag: Step By Step Guide
First, you need to verify if your website is indeed not indexed by Google. A quick way to check is by typing “site:yourwebsite.com” into Google’s search bar. If no results appear, likely, that your site is not indexed.

Step 1: Check for No Index Meta Tag
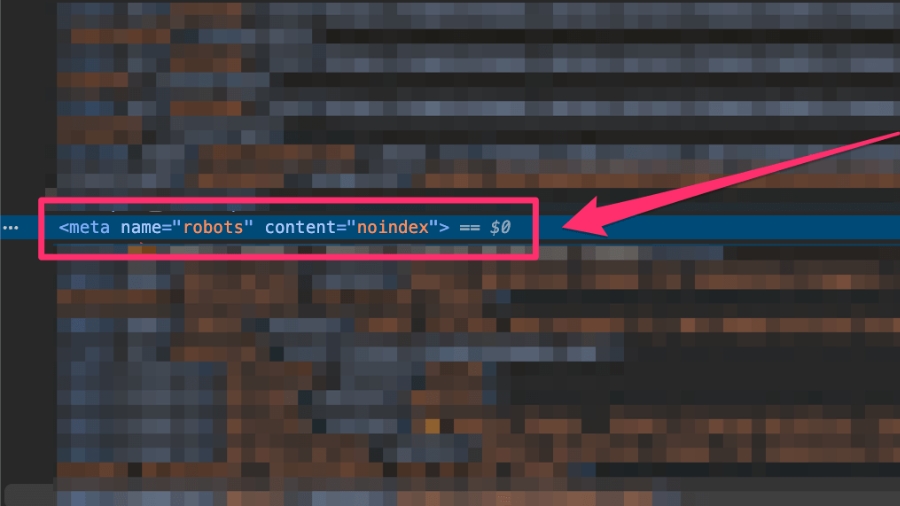
- Inspect Page Source: Right-click on your website and select ‘View Page Source’.
- Search for No Index Tag: Use Ctrl+F to find “no index”. If you find a meta tag like this, this indicates a problem. It should ideally say “index” for search engines to index your site.
Step 2: Review the Robots.txt File
- Access Robots.txt: Type
yourwebsite.com/robots.txtin your browser. - Identify Issues: If it reads something like “User-agent: * Disallow: /”, it’s preventing search engines from indexing your site.
- 404 Error: If you get a 404 error, it means you don’t have a robots.txt file, which might be okay depending on your site’s setup.
Understanding Robots.txt File
- User-Agents: These are the bots you want to follow your directives. You can specify like
googlebotorbingbot, or use an asterisk*for all bots. - Allow and Disallow Commands: Use these for directories or files. Disallow is more common as bots typically crawl files by default. Use Allow specifically for subdirectories in a disallowed directory.
- Syntax Guide: check this page for a complete syntax guide for robots.txt
Step 3: Change Search Engine Visibility Settings
To fix this, go to the backend of your WordPress website:
- Navigate to Settings.
- Select Reading.
- Look for the option “Discourage search engines from indexing this site”.
- If it’s checked, uncheck it and save the changes.
This action removes the no-index tag, allowing search engines to index your site.

Step 4 (Optional): Use a SEO plugin
- Yoast SEO:
- Navigate to Yoast SEO > Tools in your WordPress dashboard.
- Use the file editor to create or edit the robots.txt file.
- Add allow or disallow statements as needed.
- Rank Math:
- Go to Rank Math > General Settings > Edit robots.txt.
- Edit the file in the provided code editor.
- Squirrly SEO:
- Click on Squirrly SEO > SEO Configuration.
- Use the robots.txt file editor in the Robots File tab.
Step 5: Recheck and Reaudit
- Verify Page Source Again: Check the page source to ensure it now says “index”.
- Recheck Robots.txt: Confirm that the robots.txt file looks correct (ideally it should say “Disallow: /wp-admin/”).
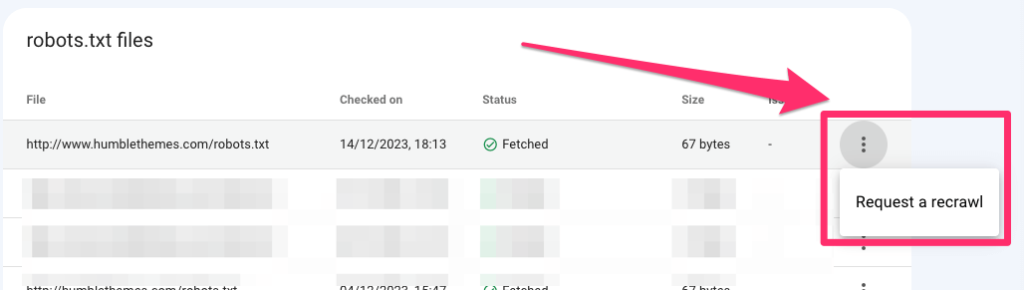
- Re-run Site Audit in Google Search Console: Visit Robots.txt settings in Google Search Console and check the status. If needed request Google to re-crawl your website
If everything went well you should see it confirmed like this:

Conclusion
Getting your WordPress website indexed by Google is a straightforward process, but it can be confusing if you’re not familiar with SEO practices.
By following these steps, you can ensure that your site is visible in search engine results. If you found this guide helpful, consider giving a thumbs up, and for any further questions, feel free to leave a comment.